I get this question a lot. In fact, it’s probably the second highest number on the “get it a lot” scale.
“How do I create a embedded link or clickable link in blog comments (or my blog posts)?”
Since this is a question I answer at least three times a week, I thought I would take a few minutes, and detail exactly how to create both an embedded image link and a embedded text link.
I will even include samples you can copy and paste into your blog comments, posts, pages or other HTML accepting areas.
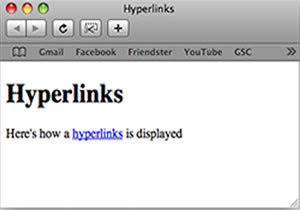
A hyperlink is text in the current post/page that is highlighted so that when clicked, the browser automatically displays another page or changes the current page to show the referenced content. The highlighted element is known as a hyperlink (or link for short).
 Creating an embedded link with text
A little tougher to define, embedded links are just another way of saying a link that when clicked, leads somewhere else. Embedded links can be more than text though. You can embed an image as a link to another page on the web.
Clear as mud, right?
Okay, let me break it down for you in everyday marketing terms. Let’s say you are an affiliate for a product and you want to create a hyperlink (link) to the sales page. (Do I have your attention now?) You can create an embedded text link or an embedded image link.
The only real difference is that where the “text” would appear, you can also insert the HTML for an image. See the samples and templates below.
The text link will contain text, also called the Anchor Text. Note: This is a great place for your keywords since Google sees the links to authority sites based on keywords as helping your SEO rank. (This is a working sample)
Click here to learn more about Your Guide To A Better Blog here.
We want that link to send the visitor to the sales page for that product. We also want to open the link in a new window, so the visitor doesn’t lose their place on our site. (You can try it, it works… but come back and finish reading how to do it.)
You can copy the text below as a template to use on your site:
How the link will appear in your page
Learn more about Your Guide To A Better Blog here
(Just be sure to replace the link location (href=””) with the link YOU want to use, and change the anchor text to include your primary keywords or phrase or something else that makes sense to you.)
If you want to make an image *clickable*, so that it leads your visitors to another site link the text link, the image you want to use has to be located somewhere on the web. In other words, you have to first upload it to your domain. The /images/ folder is recommended, but not a requirement.It can actually live anywhere on the web, even another domain.
You can copy the text below as a template to use on your site:
How the image/link will appear on your page
As you can see, both work to send your visitor wherever you want them, though both have their uses. I prefer images in my sidebar, and text links on my posts. However, I also will include images in the post and wrap the text around it (as in the example below) by adding a class to the image tag. I added class=”alignleft” in the sample below to force the sample text to wrap alongside the image.
How the image/link will appear with class=”alignleft”
 If you’re serious about building a better blog, a blog that gets indexed and shown on the search engines almost instantly, a blog that encourages visitors to keep on returning, a blog that brands you as a trusted professional and hence increases the likelihood of them buying from you… if you are serious about all this and more, then grab the Guide To A Better Blog right now, for the introductory price of $47.
Both the text link and the image link allow for additional options like alt tags, title tags and special definitions or classes. To use them, within the tag, include an “attribute” like title=”” or alt=””. These are excellent opportunities to include additional keywords. The anchor tag (<a>) can include title and target, and the image tag (<img>) can include title and alt.
UPDATE: Please note that I took the book offline, so the links above will no longer work!
title: What will appear in the “tooltip” hover effect when the mouse hovers over the link or image. For example: title=”Embedding Links with HTML sample” with display like this. Hover your mouse over this link.
target: Designates where the link is to open, in the same window or tab, in a new window or tab or in a frame. Your choices are target=”_blank”, target=”_self”, target=”_parent”, target=”_top”.
alt: Designed for the screen accessibility features for readers who need a little help, the alt (alternate text) tag is used to read to the sight impaired visitor to your site. This should explain what the photo or image is of, since they can’t see it, and the screen reader can’t describe it. The image can ALSO have the title attribute so when they hover mouse over the image, the title will display.
The two samples shown above should be enough to get you embedding links anywhere you want, including in blog comment areas, even if you don’t use the additional features.
Hope this has helped. Let me know if you have any further questions about embedded links in the comments area, I try to answer all who comment here. Come on, this is it! The place to ask questions and have them answered…